How alignment angles affect ADAS
The numeral is 1. From a prime number to how many time zones are in China, the single digit rules a lot of territory. And in the automotive world, the figure is exceptionally important when it comes to vehicles equipped with advanced driver assistance systems (ADAS).
More than one degree out of engineered range can cause a vehicle with lane departure warning (LDW) to track one foot or more to the left — or right — in approximately 60-feet. That’s roughly two-thirds the length of the average-sized, single family home parcel. Programmed into the application, the sensor fusion application is “looking” farther down the road; the average-sized, six-foot-wide car will be out of its lane within 180-feet, and there is even less roadway for its wider-body cousin, the pickup or full-sized van.
Why just one degree is so critical
Why is the magic number one degree? Its base is a combination of prelaunch design, ease of coding/update structure, and supplier contribution, all based loosely on how we “view” the road ahead, straight down the centerline of the hood. It's how our field of vision expands (peripheral vision) the farther we look down the road. Engineers don’t want the sensor-fusion to be “bouncing” all over the road — recognizing this and that — because, like us, we may miss something important and run into it. From this concept, the manufacturers’ infrastructures are learning more and more each time we put the vehicle into gear, captured over-the-air (OTA) communication between vehicle and company.
Engineers and coders analyze the collected data, and then the coding is updated and improved. The process starts all over again with the programming revised, more data collected, and more ADAS calibration/recalibration triangulation points altered. This process of collecting data and compartmentalizing and testing is called machine learning. As a loose example, it is analyzing the situation: “…if it’s ‘yes,’ go to step two, and ‘no,’ go to step 3.”
That information is recorded along with its unique set of circumstances. Eventually, there will be enough of this data for the modules to review and make their own decisions based on past events…or dare we call them '"experiences." But there are quadrillions-plus points that need to be collected before a vehicle will be able to make-up its own “mind” without human interaction. When that happens, most manufacturers say that Level 5 – full automotive autonomy – is achieved.
The sensor fusion that makes up ADAS
The human element of keeping a vehicle within the lines – and at a safe distance -- is slowly being taken over by a co-op of programmed modules: cameras (stereoscopic to quadrascopic to bioptic-stereoscopic and monovision), ESR (electronically scanning radar), sedar (spectrum enhanced detection and ranging), and a host of proximity sensors, with more modules to be introduced in the future. We know this conglomerate of sensor fusion by its more common nomenclature, ADAS. Meanwhile, there is a lot of information to be collected with one degree as the base. And it’s so important that technicians abide by the manufacturers’ programmed geometry rule.
For example: Traveling through a neighborhood with a posted 25 mph speed limit, a vehicle will travel 60 feet in two seconds. Within six seconds at that speed, the vehicle will be out of its lane and into oncoming traffic or into the woods. Going 45 mph in the city corridor? Now we are trekking 60 feet in less than one second and leaving the lane in less than four seconds. For those with a hands-free driving option, more than one degree out of calibration could be fatal; all the time, the vehicle believes that it is centered in the lane because it is not plumb with the car or truck centerline.
Meanwhile, the time allowance appears to be enough for driver correction, right? Well, let’s put it into a more common perspective to which we all can relate. If the driver is preoccupied while in semi-autonomous mode and not watching to what is going on ahead in front of the bumper:
- Within one (1) second, the average adult completes an exhale
- Within two (2) seconds, the average adult inhales and say the word, “Oh!” (cruising past the second, single family house in the neighborhood)
- Within four (4) seconds, a driver completes a no-stop, right-hand turn (out-of-lane at 45-mph)
The Insurance Institute for Highway Safety (IIHS) has doubled down on what manufacturers have been telling us all along: misaligned ADAS sensors and/or cameras out of position by more than one degree will relay false-positive data back to other connected modules. Subsequently, this inaccurate information will affect how ADAS sensors/cameras "see” the road ahead. If component(s) related to an application such as automatic emergency braking or adaptive cruise control is out of range, corrupt data will confuse manufacturer programming, and most likely the outcome will result in an accident. ADAS module alignment is that important.
It's not just about pushing buttons to center, adjusting the line of sight of ADAS components. We need a strong, accurate base on which these sensors and cameras ride: the vehicle’s steering gear and suspension, body recalibration.
For those of you who had algebra in school — and told your counselor that you would never, ever use this advanced math after you graduated — you’ve been doing just that while correcting alignments on cars and trucks: plotting x, y, and z. And just like the triangulated calibration/recalibration of ADAS sensors to a designated position, so goes camber, caster and toe in an alignment reset.
A case study: a Dodge Charger with a brace of ADAS features
Today’s subject vehicle: a 2019 Dodge Charger equipped with adaptive cruise control (ACC), blind spot sensor (LBSS; RBSS), park assist (PAS), rearview camera (RVC), park assist module (PAM), and forward-facing camera module (FFMC). The ACC is static calibration/recalibration; the FFCM is dynamic. Those of you who have had the pleasure of aligning vehicles with four-wheel steer, the following steps do have significance toward your final goal as well, a properly aligned vehicle.
There are a lot of boxes to check before we start turning wrenches. Most importantly, we need to validate the test equipment. Post-scuff-boards and camber/caster hub gauges, we’ve been spoiled rotten with easy-to-calibrate software and targets. And in this ever-changing world, manufacturers’ alignment specs can be amended to complement ADAS functionality.
When you perform your daily tablet/scanner updates over the air (OTA), make sure to include your aligner in the mix, as there can be changes to one of the angles which would be sent over to your aligner-brand’s headquarters for redistribution. The second – and most of us get caught up in the rush of the shop and forget – is to check the vehicle’s steering gear/suspension TSBs and alignment numbers from either your shop management or the manufacturer’s site.
Now is the time to get in the habit of performing these basic tasks. As we get deeper into the vehicle autonomy levels, you will see these modifications more and more common place along with ADAS calibration/recalibration numbers as the science of driverless transportation moves forward.
Check the equipment before the alignment
In most shops, the alignment rack is a specialty lift that is often used for other purposes when not occupied with an alignment service. I’ve been in thousands of shops through the years, and it was commonplace to see a medium-duty truck on the alignment lift that most likely exceeded the weight limit of the equipment. The excess stress on components can affect the level of the runways and support structure; these are items to be level-checked before the next alignment of any ADAS or non-ADAS influenced car or truck.
Another “no-no” I’ve observed: tires on the turntables – most times I’ve seen them unlocked and the plate is pushed to its limit to one side or another. On newer systems, the plate metal bearings have been replaced with neoprene ball bearings. It's an easily damaged wearable item. The debris that gets caught between the plate and base can exacerbate the poorly performing turntable. A common result of this issue is an off-centered steering wheel. The customer's complaint is of the vehicle “pulling” as the driver attempts to center the offset steering wheel while going down the road, which is detrimental to ADAS-equipped cars and trucks. In the future, check the platform to see if it can be easily moved with the slightest touch, and in all quadrants, periodically clean and replace plastic plate bearings as needed.
So, we have the aligner software updated and have verified that there were no alignment TSBs from the shop management system/manufacturer’s site. The rack is level with properly operating turntables. It’s time to set up our vehicle and align. Or is it? Let’s check out where the rubber meets the road and the rims that support them, first.
We’ve all been there and have seen the results of trying to “help” someone out by aligning a vehicle with mismatched tire treads to make a sale. It stops, today, when it comes to ADAS. Before setting up the car or truck, check the car or truck for bent rims, tread separation, or sidewall damage, all of which can all play a role regarding how well the vehicle will read off the targets. Remember: we are measuring specs within hundredths of a degree. One item noted above may not make a difference, initially, but when combined with the remaining steering gear, suspension, vehicle body placement adds to the equation. And don’t forget to set tire pressures per manufacturer specs (in the shop management system) or from the SCCL door jamb sticker.
What to know instead of "set the toe and let it go"
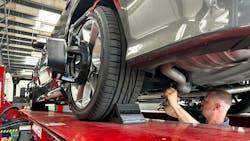
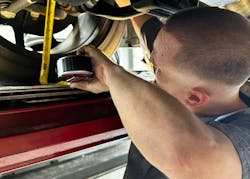
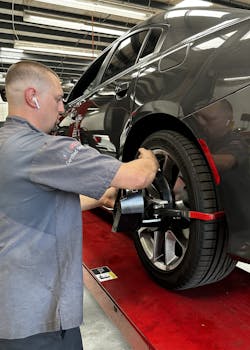
It's time to drive the Dodge up-and-centered on the runways. And just because this vehicle does not have any factory-installed adjustments for caster/camber, there are factory (most likely) aftermarket parts replacements, and shifting the cradle is an option. Dismiss the former mindset of “set the toe and let it go.” It just does not cut it anymore.
Before hanging targets on the hubs, we are going to check for any ADAS and/or alignment (sensor) issues via code representation. Be sure to print the pre-scan for documentation. Of course, if there are any alignment-related codes, those must be addressed before any angle corrections. Another step that is more and more skipped over: the shake-down, front, and back. Blame it on a time-push from the front desk to just forgetting to do so because you’re out of practice, but we need to go back to verifying the stability of all steering gear and suspension parts, along with a visual inspection of any bushing material (e.g., control arm bushings) Old school wisdom was it as common to allow 1/8-inch movement in the ball joint. Times have changed and 1/8" is equivalent to 0.13" (rounded; 1 ÷ 8 = 0.125), which is equivalent to 0.03 degrees. A hundredth here, a tenth there. It all adds up. Always refer to the manufacturer's specs regarding component movement allowances.
- Ride height: Another forgotten and assumed “good” measurement. You are thinking camber, caster, toe – a three-dimensional point to triangulate, you need to remember that the vehicle itself is a three-dimensional component that influences our alignment outcome. Check body mount condition, couplers and body damage that can successively influence the alignment.
The last thing before compensation is to take a moment and perform an old-fashioned, diamond-out-of-the-body angle. How many times have we seen the aftermath from a freshman tow truck driver who hooked up to a vehicle via the rear trailing arm? Sometimes it’s obvious; others, not so much. That’s when taking a few moments and using a laser measure (for old school habits, we used a tape measure) to check wheelbase and choose an undercarriage point to find the intersecting point mid-vehicle. New vehicle or old vehicle, it doesn’t matter. Stuff happens from the transporter to the new dealership: snowbank mishaps in parking lots, potential customer driving and happens to get into a red-light impact…the list goes on. Know what you are working with before setting x, y, and z.
- Compensating the angles: The software used to calculate camber, caster and toe is very fickle. The first compensation the tech performed on the 2019 Dodge regurgitated numbers that would have the tire tread “wiped” and pulling very hard right. It’s obvious with these 20,000-mile tires that this is not the case. Common sense and proper training allowed the technician to understand that he’s been given bad data and recompensates to receive a more rational reading.
Begin at the rear of the car
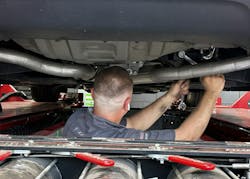
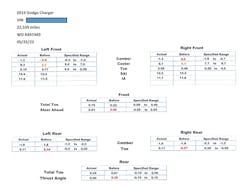
Let’s dial the numbers back into specs starting at the rear of the car. While our camber is satisfactory, the toe is out of range. That's an easy, necessary fix. But more importantly, the thrust angle is significantly out of range. This is a big factor for a vehicle to “dog track” (or what our German automotive engineer cousins affectionately call “dachshund-run”). This critical correction cannot be ignored. For the tech aligning a unibody, they just about always have the option to shift the cradle (front or rear) of the unibody to correct misaligned camber and or thrust that is a little beyond specs. If the unit is “bent,” the part can be replaced; afterwards, it's diamonded-out for alignment accuracy.
Even solid rear axles need to have the rear wheels compensated. It may not have adjustment points, but we can tell if the axle has shifted – from mount points to frame damage – and it needs to be properly addressed before an alignment can be performed.
Move to the front
- Camber: I always tell my students how to differentiate between negative and positive camber this way: “You’re at a car show. You are ‘leaning-in’ on the front fender of a participant vehicle. This is bad; the owner will ‘yell’ and tell you to get off the car – a ‘negative’ experience; negative camber. And if you are ‘leaning-away’ from the fender, then you won’t suffer the repercussions of the show car owner, and this is a good experience; positive camber.”
The reason for these two options lies within the vehicle’s suspension design. In the case of our test vehicle, the required negative camber complements the SLA design to “hug” corners with road force being applied to the geometry of the tire angle and not through the vehicle, itself. But on other suspension designs, this slant could be detrimental.
Other vehicles that have a MacPherson strut or wishbone design may not have camber adjustment. This is to be addressed on a vehicle-to-vehicle basis. Some manufacturers required drilling out preformed points on strut mounts or where the strut meets the spindle to adjust suspension settings. For those that don’t allow this angle to be addressed, in most cases the cradle can be moved, adjusting to factory specs. If that doesn’t work – and the vehicle is ADAS equipped – it’s off to the body shop to check/repair based off the vehicle centerline.
And while we are mentioning it, don’t forget to look at the “SAI/IA” on the printout.
- The steering angle included (SAI) and included angle (IA) reveal a lot of information regarding how the vehicle handles. The SAI influences how the steering reacts when the wheel is turned in one direction or another. SAI supports positive camber and therefore provides directional stability; it aids in the effort to return the steering wheel to zero (0) upon completion of turn left or right. The IA is nonadjustable but loaded with info, as its readings will change when the camber is changed. The key ingredient for both SAI/IA is the left and right side have no significant value difference. That would indicate damage to a component, if so, which means a stopping point and further evaluation is needed to assess the extent of the issue.
- Caster: This is another important angle that is ignored by some techs because of the “nonwearable” mindset. This sweep is important as to how the steering wheel reacts to the roadbed. But don’t do the “old-school" method and manhandle the tire while conducting the caster sweep on command of the aligner. This will lead to an inaccurate evaluation of the angle. Standing (not sitting in the driver’s seat) next to the car or truck (with the rack at floor level for safety) and turning the steering wheel to complete the compensation is essential to receive a correct measurement.
The main reasons we have a positive caster on cars and light trucks is to assist the remaining geometry during cornering and higher speed, steer-ahead travel.
And don’t forget that the preferred split is the right front wheel leading the left front by +/- 0.5-degrees to compensate for road crown/drainage angle. Again, if no eccentric replacements (different degrees than factory-installed) are available, then shifting the cradle is another solution to get the vehicle into specs, as was the case with this Dodge’s original caster degree split, which was not the desirable, recommended ½-degree to eliminate road slope “pull.” Now, onto the final adjustable component.
- Toe: This tracking geometry can either be positive or negative depending upon the vehicle year, make and model (YMM). Positive toe points the front of the tire inward toward the vehicle centerline. (Where have you heard “centerline” during and ADAS calibration/recalibration set-up?) Vehicles requiring a negative toe setting mean the tires have a slight “outward” geometry. Again, this format is based upon manufacturer design.
And the toe setting has a lot to do with camber relationship. The association between the two settings is based on rolling resistance and tire wear. When a vehicle is turning a corner, camber and toe settings work together to decrease tire wear and rolling resistance and increase steering stability – all at the same time.
- Verifying our repair: Now, we “lock down” the alignment adjustment and verify the “straight” steering wheel and SAS accuracy. For this 2019 Charger, the pre-check and set was performed prior to adjustments per manufacturer. But we have all been there with the steering wheel holder shifted during the alignment process and our steering wheel may appear straight – and drive straight – but the delta angle is off a degree or two (I've seen this happen too many times). Remember, our ADAS-related components are looking at the SAS as well.
On some vehicles, the SAS is the module that also monitors distracted/drowsy driving. Others use the SAS input along with cameras that monitor eye movement for inattentive driving. And, more recently, fatigue is also being detected through the steering wheel by measuring grip-force.
Recalibrating ADAS after the alignment
There are many manufacturers that require ADAS recalibrations post-alignment. Check either the OEM site or the shop management system to verify the vehicle on which you just set camber, caster and toe is not one of the many models requiring this step.
Our final alignment specs have been printed and static ADAS post-alignment recalibrations have been performed per the factory requirement for this 2019 Dodge. It is time to verify our geometry changes on a test drive regarding handling by confirming a straight steering wheel. And this would be the opportunity to perform any dynamic ADAS post-alignment recalibration, if required.
Don’t forget your post-scan report when you turn in other vehicle documents to the front desk for customer check-out.
A question that I am often asked is, “Why do they (manufacturers) allow such a broad spectrum between acceptable and out-of-spec on vehicles if the numbers are so critical to ADAS function?” The answer is it’s a combination of interaction between the vehicle and outside elements beyond OEM control. Among the many examples, here are a few to ponder:
- Entropy: Things “sag” as gravity overpowers centrifugal force over time, including steering gear/suspension parts, body components, etc.
- Roadway: Potholes and surface construction/reconstruction are major components that tug on steering gear and suspension components/connections over time
- Human element: “Tapping” curbs, tire construction wear-deterioration and accident damage
It is extremely important to verify a complete, in-specification alignment before any ADAS calibration/recalibration is performed. The flip side of this coin? The vehicle will return to your shop — only this time not as a paying customer. The technician is subject to an unpaid “redo,” the business “word-of-mouth” advertising is compromised, and you possibly lose a customer to another shop. And everyone — including the returning customer — has less disposable income based on time wasted on a repeat event. And it all circles back taking one moment to verify the proper steps were taken when it comes to ADAS. Just one.
About the Author
Pam Oakes
Automotive SME Pam Oakes has been embedded within the automotive industry for 30 years as an automotive applications engineer, instructor/course developer (for several international companies), 609 instructor/test proctor, automotive business expert/strategist, 20-year original start-up shop owner/multiple auto business owner, ASE master automotive and medium/HD truck and collision technician-trainer with L4 ADAS, diesel Class 8 instructor, ASE testing contributing panel member (L4/A7), automotive author, syndicated radio host, and automotive-consumer news media commentator. And she still “turns-wrenches” for fun.
