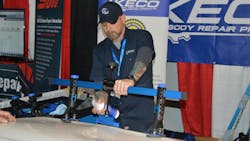
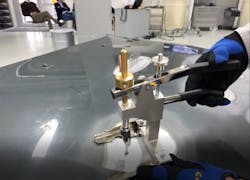
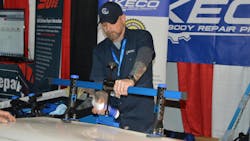
While the glue or weld key tab pulling process has been around for a few years, I have noticed more shops using it lately. When I talk to users of these systems, I find that some are having problems with the process. As I investigate these problems, I find that it usually isn’t the process, but how it is followed. To help customers find solutions, I decided to audit the process to find pain points. My research showed that glue pull tabs were not sticking when the application area wasn’t properly prepared, and the weld key tabs were not holding if the ground position was not attached to bare metal. I discussed these findings with the system manufacturers, and they provided me with the steps required to prepare the areas of repair. When I looked at how the repairs were documented on damage appraisals, I understood how technicians could overlook some of these steps.
Include Critical Steps in the Damage Appraisal
Those who attended my workshops know that I continually reinforce that if you want a technician to follow specific steps, the instructions should be included in a damage appraisal as individual repair lines. As I reviewed the processes, I saw critical steps that, if identified, would alleviate some of the issues technicians were having with the systems.
Looking at the glue pull tab process, the first critical step is to clean the panel surface with an alcohol-based cleaner. A suggested repair line would be “Clean panel surface” with a line note describing the step “Clean panel with alcohol-based cleaner to promote glue pull tab adhesion.” Using an individual line like this would give technicians clear instructions and assign this task a labor value that can be applied to obtain reimbursement. The second step is to polish the panel. Helpful documentation could be “Polish panel” with a line note stating “Polish panel with fine polishing compound to remove impurities and provide a smooth surface for glue pull tab adhesion” to help reinforce the need for the step and obtain an opportunity for labor reimbursement. As I continued reading, I found the third step is to remove moisture from the panel. I thought this was the most important step and could possibly be the major cause of glue pull tab failures. A repair line written as “Remove moisture from panel” with a line note of “Use a heat gun with moderate temperature to warm panel for 3–5 minutes to remove trapped moisture from panel to promote glue pull tab adhesion” would explain the requirement and allow for labor reimbursement.
Weld Key Tab Process Requires Steps Similar to Glue Tabs
I found similar steps for the weld key tabs. The weld key tab process requires the panel surface to be cleaned like the glue pull tab process. That step is followed by preparing the panel surface. A helpful repair line would be “Prepare panel surface” followed by a line note of “Grind panel surface with 80 grit disc to prepare area for weld key attachment.” The critical step that I found technicians missing the most was preparing the ground connector site. Creating a repair line identifying the requirement, “Prepare ground connector site” and a line note explaining the need to “Remove paint from ground location to ensure positive contact for grounding pin” would help a technician understand the requirement and gain labor reimbursement for the step.
Assign Pulling Operation to 'Align'
As I watched technicians navigate through the glue pull tab and weld key tab processes, I also saw the requirement to set up a bridge lifter to facilitate the panel alignment. Listed individually, this step would also create an opportunity for labor reimbursement. When I reviewed damage appraisals for this process, I typically found a repair line with a labor value for the entire glue pull tab or weld key tab as well as the panel repair process. In reality, technicians “align” a panel with the glue pull tab or weld key tabs, and a repair follows the alignment. The operation could be broken down using the “Align” operation for the panel in the estimating database for the glue pull tab or weld key tab steps and then selecting the panel again using the “Repair” operation to illustrate how the repair is being accomplished.
Using Repair Lines to Define Required Processes Will Ensure They Are Followed
Using the damage appraisal to define steps is the best tool to bring success to any repair. Using the repair lines to define required processes will ensure they are followed and eliminate complications allowing a repair to be completed as expected. As I mentioned throughout this article, none of the steps defined are included in any repair operation so individual labor values can be added to improve your labor profitability. In most cases process steps are overlooked because they are not itemized and do not have a labor value. Research the process steps for specific equipment and itemize the individual steps to bring value and success to the operation.
Read the article? Get AMI credits!
This article is worth .25 credit hours toward Automotive Management Institute (AMi) designation programs. To receive credit, log in or set up a free “myAMi” account at ami.knowledgeanywhere.com. Then click here or search for "Accounting for Glue" to get to the quiz.
About the Author
John Shoemaker
John Shoemaker is a business development manager for BASF North America Automotive Refinish Division and the former owner of JSE Consulting. He began his career in the automotive repair industry in 1973. He has been a technician, vehicle maintenance manager and management system analyst while serving in the U.S. Air Force. In the civilian sector he has managed several dealership collision centers, was a dealership service director and was a consultant to management system providers as an implementation specialist. John has completed I-CAR training and holds ASE certifications in estimating and repair. Connect with Shoemaker on LinkedIn.


