Solving Solvent Pop
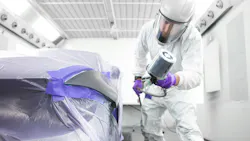
Anyone who has struggled with occasional solvent pop knows how frustrating it is to spray a vehicle and feel like you’ve laid down a perfect paint job only to find a mess of tiny bubbles and pinholes in your clear after the bake cycle.
Here are some of the most common causes of solvent pop, how to avoid them, and how to repair a panel if you do get them.
First, we’ll need to go over what solvent pop is. Solvent pop occurs when too much solvent is left in your clear when the surface of the clear film build “skins over” and seals the evaporating solvents inside. Those trapped solvents can form bubbles that may or may not stay under the surface of the clear after a bake cycle. If they partially make it out of the surface of the clear, they will form tiny pinholes.
Solvent pop can be caused by many things, but one of the most common reasons is excessive clear film build. Almost always this will be on top, flat panels, where painters have no fear of running the clear. Often times, painters will try to get their clear as flat as possible by over applying it, which can lead to solvent pop in the clear. Most clear coats require a film thickness of 2-2.5 mils. If you exceed that, you’re more likely to have popping issues, depending on the clear you’re using. Always check the TDS for the recommended mil thickness and periodically check it with a mil gauge reader.
One of the other causes of solvent pop due to excessive film build is a gun setup and spray technique that’s not optimized for a specific clear. Of course, using too large a fluid tip will cause this, but so will not spraying at the recommended pressures. Even with the proper fluid tip size, if your spray pressure is too low, you will be spraying with bigger droplets - which usually requires heavier spraying to get the clear to lay down smoothly.
Another common cause is using incorrect hardener or reducer for the temperature. If you’re trying to get the job done faster by using fast hardener and reducer, you run the risk of solvent pop. This is more common during the change of seasons. Using too fast of a hardener can cause the top of the clear film to seal off the solvent underneath and cause solvent pop by not letting the gasses escape. Ensure you’re using the proper temperature hardener and reducer to make sure the clearcoat stays open long enough for most of the solvents to evaporate. If you’re in-between reducer temperature ranges, err on the side of slow to make sure you don’t have issues. A couple of extra minutes of flash time takes a lot less time than otherwise unnecessary buffing or even a respray.
The last common cause has to do with flash times and bake parameters. Always go back to the technical data sheet and make sure you’re obeying proper flash times, and the booth bake cycle is set up correctly. If the clear is supposed to have a 5–10-minute flash between coats; wait for the 5 to 10 minutes. Those clears need the first coat’s solvents to evaporate before applying the second coat. Some clears are made to be sprayed back-to-back without flash, but if it isn’t, don’t try to make it do what it wasn’t designed to do. There is also a flash time before baking that needs to be followed. Some clears can be baked immediately after spraying, while some need a flash of up to 10 minutes. Putting heat on too soon or baking at too high of a temperature can seal off the top of the clear before the solvents get a chance to evacuate from underneath, which will cause solvent pop.

Also, when spraying water-based paint in a booth with a flash cycle, make sure your panels cool back to room temperature before clearing. Many booths with a flash cycle also ramp up the booth temperature when the blowers turn on to help speed up the basecoat drying process. If the panels are still hot from the flash cycle, it can lead to solvent pop as well.
If you do have solvent pop when you pull the car out of the booth, you’ll have to carefully inspect them and see if they are on the surface only, or if they are bubbles fully encapsulated in the clear film. If it’s a mild case just on the surface, you may be able to fix them with sanding and buffing. If it’s under the clear, it’s going to have to be sanded and resprayed. You’ll need to sand the surface flat and make sure there are no remaining pinholes in the surface before respraying with base and clear.
Following these troubleshooting steps will help keep the solvent pop to a minimum and keep production moving through your paint booth without needless delays.
About the Author
 Michael Nelson
Michael Nelson
Refinish Trainer
Michael Nelson is a refinish trainer at the 3M Skills Development Center. Michael has served the collision industry for 29 years. He previously held production painter and product specialist roles for Finishmaster and Axalta Coating Systems. He trains painters and preppers from across the country on all aspects of the collision repair process.