Improving weld quality: Key adjustments in technique for better repairs
Key Highlights
- Proper welding technique focuses on three key adjustments: standoff distance, torch angle, and travel direction, which can dramatically improve weld quality without changing machine settings.
- Maintaining a consistent standoff distance of 10-15 mm ensures optimal penetration, weld appearance, and shielding gas performance, especially during vertical or overhead welding.
- Torch angle and travel direction influence heat distribution and weld penetration; pushing the torch forward on aluminum helps control heat and improve weld integrity.
- Incorrect adjustments, such as moving the torch farther away for visibility or using a single machine setting, can lead to poor welds, panel damage, or failure during testing.
- Welding quality directly impacts vehicle safety and performance, emphasizing the need for technicians to master fundamental techniques rather than relying solely on equipment or OEM procedures.
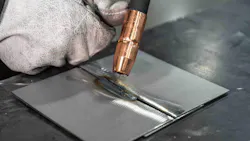
Welding has been around for generations, and throughout my career I have seen its methods, equipment, processes, and techniques continue to evolve. Advances in technology have played a major role. But so have changes in structural design and the alloys we join. Together, these developments have led to important improvements in the field.
One area that is still often overlooked, however, is technique. Technique has a major impact on both the welder and the quality of the weld itself. As an administrator of the I-CAR Steel MAG Welding Certification test at the 3M Skills Development Center, I regularly see common mistakes that lead to poor weld quality and failed tests. What surprises me most is how often, after I coach someone on a correction, I hear the same response: “No one has ever shown me that.”
When I break welding down to its fundamentals, a good weld requires two things: penetration and fusion. A weld does not need to look like a perfect stack of dimes to be sound. While appearance may be visually pleasing, some of the best-looking welds fail because they lack penetration into the lower panel, resulting in a cold break or a weld that peels off during destructive testing. Another common failure comes from a lack of fusion on the top plate, which in some cases is also described as a penetration issue, depending on the weld type.
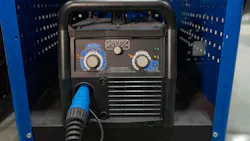
One of my biggest frustrations is seeing technicians put marks or arrows on their welding machine because “that’s where it welds best.” To me, that is a clear sign that many of the vehicles they weld may not be repaired correctly. Many replacement panels require welds that also demand machine adjustments to control heat, avoid damaging the substrate, and still achieve proper penetration. A single machine setting for every weld, marked on the machine as the “best” setting, is usually too hot for most repairs and can damage the panels being repaired or replaced.
As OEMs publish more detailed repair procedures, they include recommended equipment, settings, specifications, and parameters for the welds on their vehicles. Those settings matter, but they are not the only variables that need to be adjusted. In my experience, there are three major corrections that can dramatically improve weld quality without changing the machine itself. Instead, they require adjusting the welder: standoff distance, travel direction, and torch angle. These are the most commonly overlooked factors, and they are also the corrections I provide most often in training.
Standoff distance, or the distance between the contact tip and the work surface, has several effects on the weld. The farther away I hold the torch, the less penetration I get and the taller the weld becomes. If someone says, “I get plenty of penetration and I don’t get that close,” my first thought is that the machine is probably set too high. A typical recommendation is to stay about 10 mm to 15 mm from the surface while welding and, just as importantly, to follow the shape or curve of the panel so that the distance stays consistent throughout the weld. Any change in that distance affects penetration, height, and width in real time.
This is also one of the easiest ways for a technician to improve weld quality without touching the machine. It becomes even more important when transitioning from horizontal to vertical or overhead welds. The distance may need to change slightly to accommodate wire-speed variation caused by liner friction and gravity. In overhead welding, technicians often struggle to see the weld and instinctively move the torch farther away for visibility. Unfortunately, that reduces penetration, increases weld height, and decreases weld width. This is the most common failure I see during welding certification testing.
The correction I give most often is simple: move closer without changing the machine settings. Time after time, that one adjustment turns failed welds into passing welds because it increases the penetration and reduces the weld height.
Standoff distance also affects shielding gas performance. It influences the gas’ ability to protect the weld zone, keep contaminants out, and help cool the weld to reduce the risk of cracking in and around the weld after completion. If I see a technician using a very high gas flow rate, it is often a sign that the standoff distance is too great. On the other hand, if the torch is too close and the gas flow is still too high, it can negatively affect the weld puddle. I have seen excessive gas flow disturb the puddle and even create porosity because of turbulence at the weld surface.
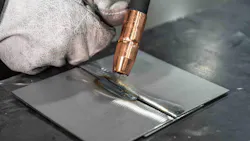
The third correction I focus on – torch angle – is closely tied to the second correction, travel direction. Torch angle is simply the direction in which I hold the torch while welding. The key principle is this: wherever the wire is pointing, that is where most of the heat is going. If the wire points to the left because that makes it easier to see the weld, then the left side of the root gap or plug weld will receive more heat and more penetration than the right side, and vice versa. That imbalance becomes a major factor in weld consistency and quality.
Travel direction is still widely debated, and it always makes for an interesting class discussion. The three methods people usually mention are push, pull, and perpendicular. Like many others, I was originally taught to pull when making a stitch weld or continuous weld. On steel, there is still debate about which method is best in every situation. On aluminum, however, pushing is the correct method for a proper weld.
When I push the weld forward, I move the heat ahead of the weld puddle. That allows me to use a lower, cooler machine setting without sacrificing penetration. On aluminum, this helps preheat the material, which is essential because aluminum dissipates heat very quickly. Pushing also keeps the shielding gas moving forward to protect the weld and helps remove very fine contaminants that may remain even after proper cleaning.
With today’s mixed alloys and the forming processes used to create high-strength steel structures, push welding can also help control heat and reduce the risk of substrate damage during the repair. That said, many technicians still use the pull method successfully. Pulling can produce quality welds, but it is important to understand that the heat is then concentrated behind the arc, heating the area that has already been welded. Changing from push to pull often requires additional adjustments, including machine settings, to avoid excessive penetration, excess heat, or warping.
Both push and pull are common for open butt welds or butt welds with backing. However, when it comes to plug welds, in my professional opinion, there is only one acceptable method: perpendicular. I use a perpendicular approach for much of my welding, but it is especially important for plug welds because I need the heat directed straight into the bottom panel to achieve fast, proper penetration. If the torch is angled and the wire points toward the top plate, I may see weld failure on one side during destructive testing. Keeping the torch at 90 degrees during plug welding also helps control the puddle, maintain a cleaner weld zone, and allow post-flow shielding gas to cool the weld properly before moving to the next one.
Welding is one of the most critical parts of the repair process, and it has a direct effect on how a vehicle will perform in a future collision. Most vehicles today require recalibration after repairs are completed, and I ask every class the same question: “During recalibration, where is the oops button?” When recalibration is performed, the vehicle’s systems are being reset to say everything is properly repaired and ready for the next collision event. But there is no place to enter, “I overheated the panels during welding, so adjust the airbag timing,” or “My welder was not set correctly for that steel, so penetration may be too high or too low.” There is no oops button.
That is why welding technique matters so much. The machine matters. The OEM procedure matters. But the technician’s control of distance, direction, and angle often makes the difference between a weld that only looks acceptable and one that is structurally sound. In my experience, improving those fundamentals is where real welding quality begins.
About the Author
 Ryan Marrinan
Ryan Marrinan
Application Engineer, Training and Education
Ryan Marrinan is a senior application engineer, training and education, for 3M’s Automotive Aftermarket Division, supporting global fillers, adhesives, coatings, and sealers. Prior to moving into a full-time role with 3M, Ryan served as a collision repair technician for 20 years and during that time, as an independent consultant for 3M’s Automotive Aftermarket Division for 15 years. During his time as a technician, Ryan specialized in heavy collision and structural repairs, as well as glue pulling and paintless dent repair. Ryan is an I-CAR-certified technician with vast experience and understanding of OEM repair requirements and procedures. As a 3M application engineer, Ryan has the understanding and knowledge to replicate and develop OEM coatings and seam sealers to meet the standards and needs of the collision industry.