Mastering welding: Ensuring safety, quality, and OEM compliance
Key Highlights
- Understanding and maintaining welding equipment is crucial for consistent, high-quality welds that meet safety standards.
- Proper preparation, including matching materials and welding positions, ensures accurate setup and effective weld penetration.
- Conducting test welds on practice coupons that replicate actual vehicle conditions helps verify weld quality before repair.
- Implementing a shop-wide accountability process, including training and documentation, ensures adherence to best practices.
- Following OEM guidelines, performing destructive tests, and establishing rigorous inspections are key to reliable vehicle repairs.
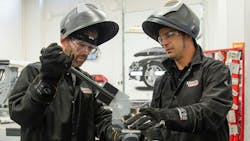
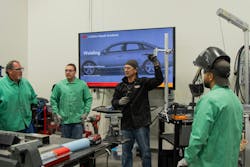
Welding is a process that has evolved significantly in our industry over the decades, with advancements in weld types, equipment, machinery, processes, and substrates. However, the need for a quality weld that performs reliably remains unchanged. Despite the passage of time, it's surprising how many individuals still struggle with achieving this standard. At the 3M Skills Development Center, I observe this challenge weekly. A common underlying issue is a lack of understanding of the fundamental basics, which leads to many of these difficulties.
I emphasize this point in every class: if a vehicle is not deemed a total loss, your responsibility is to repair it so that it can safely return to the road, capable of withstanding similar or even more severe accidents while managing crash energy as originally designed. Customers expect this level of safety when they pick up their repaired vehicle. During recalibration, the vehicle's systems assume that all repairs and welds meet specific standards. There is no "Oops" button to account for poor penetration, lack of fusion, or any weld imperfections that could alter the performance or timing of the vehicle's safety systems in a future accident. So, how can you ensure that you've done the job correctly?

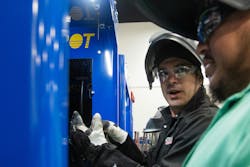
To optimize your welding operations, it's essential to have a deep understanding of your equipment's functionality and maintenance requirements. This includes ensuring the equipment receives the correct power supply, understanding how different settings and adjustments affect the welding process, and developing a comprehensive standard operating procedure for storage and maintenance. Since most equipment is shared within the shop, a well-defined SOP is vital for maintaining consistency, extending the equipment's lifespan, and ensuring peak performance.
Have you ever wished for a guide that provides precise instructions for achieving faster and, more importantly, correct welding results on vehicles? original equipment manufacturers have specific requirements for panel prep, welding equipment, wire, gas, and settings. While this information may not be included in the repair procedure, it can often be found in position statements. These statements may apply to all makes and models or just one, making it essential to review them for every repair. A simple search for "welding" or "welding conditions" during the research and planning phase will likely lead you to the necessary information on approved equipment and setup. This includes the types of welds based on materials, material thickness, locations, shielding gas, and other joining considerations. There is no "general rule" that suffices for all makes and models. Many OEMs also mandate destructive test welds for every type of weld being made. However, compliance with these requirements is often inconsistent. Technicians frequently skip these critical steps, sometimes citing reasons like "It's not on the estimate," or "They didn't pay for that." This mindset can compromise the integrity of the welds and, ultimately, the safety and reliability of the repairs.
Technicians frequently skip destructive weld-testing, sometimes citing reasons like 'It's not on the estimate' or 'They didn't pay for that.' This mindset can compromise the integrity of the welds and, ultimately, the safety and reliability of the repairs.
- Ryan Marrinan
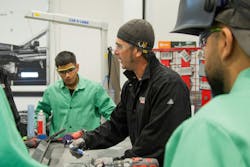
One of the most frustrating practices I observe in shops is when a technician makes a weld, sets the welder down, grinds the weld, then picks up the welder to make another weld followed by more grinding. This is the number-one indicator of poor welds being made. Technicians are aware of this and quickly grind the welds to conceal the issue. It's also an inefficient way to attach a new panel, often resulting from not taking the time to properly set up the welder and perform test welds, both of which are non-included operations required by the OEM to ensure weld quality. How else will you know if you have penetration on a butt joint if there's no access to the back to see? And even if you did, once the weld is made and it's not right, what is your next step?
When setting up and making test welds, it's essential to follow these important guidelines:
- Use Appropriate Practice Coupons: Always cut practice coupons from the undamaged sections of the original panel or discarded parts of the replacement panel, never from "scrap metal." I-CAR coupons are not suitable for setting up a welder for repair, as they do not match the vehicle's mPa, gauge, or treatment, making them unsuitable for practice welds.
- Consistent Panel Preparation: Prepare the practice panels in the same manner as the vehicle. This includes using the same tools and abrasives. For instance, do not use a DA with 80 grit on the practice panel if the vehicle was prepped with a coarse Scotch-Brite belt or another abrasive. The removal of coatings and panel thickness should be identical to ensure accurate machine setup.
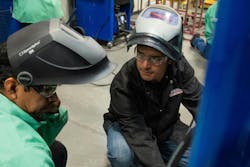
- Match Welding Articulation: The welding position on the vehicle should be replicated when setting up test panels. If welding overhead on the bottom of a rocker, create test coupons for overhead welds. A dedicated welding test station in the shop is beneficial for this purpose. A good station allows you to position and hold panels as they will be on the vehicle and should include tools for testing welds, such as a vise and hand tools for peeling or twisting coupons apart, along with space for documentation and photos for the estimate. Simply sanding some metal and running a few beads is insufficient preparation for vehicle welds.
- Proper Grounding: Ensure the welder is grounded within 12 inches of the welds being made. Extending this distance increases resistance, typically requiring higher welder settings and resulting in more heat application. Keeping the ground close and on clean metal, as with your practice coupons, leads to better welds.
- Replicate Joining Methods: Set up practice panels using the same joining method as the vehicle. Whether it's an open butt, butt with a backer, or a plug weld, ensure the root gap or plug weld is the same size as on the vehicle. The root gap or plug weld size determines the weld time, heat duration, and amount of wire speed needed for proper penetration and fusion. If these are not consistent, the machine will not be properly set up.
Let's be honest, even when all guidelines are followed, accountability remains a significant challenge. As a trainer at 3M, it is my responsibility to provide education to our students on the best practices, procedures, and requirements available. However, I believe that shops should establish a process for accountability, especially for such a critical aspect of the repair, to ensure it is done correctly. Practice coupons and proper documentation are often sufficient, but if these are not captured accurately, who is responsible? Who will oversee this process in the shop to ensure that when we return the vehicle, the repairs — or welds, in this case — are completed properly?
Whoever is tasked with this responsibility should be included in the welding training that shops provide for their technicians. This training could be offered by equipment manufacturers, the OEM, or another certified third party capable of administering both hands-on and knowledge-based testing. Comprehensive training ensures that the shop and those responsible for repairs can distinguish between correct and incorrect practices. It also equips them with the skills to make necessary corrections or document processes accurately, thereby maintaining the shop's cycle time and ensuring high-quality repairs. Investing in thorough training not only enhances the skill set of the technicians but also reinforces a culture of accountability and excellence within the shop. Enhancing welding practices is crucial for ensuring the overall quality and safety of repairs in our industry. By recognizing the importance of proper welding techniques and strictly adhering to OEM requirements, we can significantly minimize the occurrence of substandard welds. So, what is the straightforward solution?

- Adhere to OEM Guidelines: Ensure that all welding equipment, materials, and settings are in full compliance with OEM specifications to maintain consistency and quality.
- Educate Technicians: Provide comprehensive training on welding techniques and emphasize the importance of following OEM guidelines to equip technicians with the necessary skills and knowledge.
- Conduct Destructive Tests: Regularly perform destructive test welds to assess and validate the quality and strength of the welds, ensuring they meet industry standards. Implement Inspections: Establish a rigorous inspection process to verify the quality of welds before they advance to the next stage, ensuring that only high-quality repairs are completed.

By focusing on these key areas, we can elevate the standards of welding practices, leading to safer and more reliable vehicle repairs.
About the Author

Ryan Marrinan
Ryan Marrinan is a senior application engineer, training and education, for 3M’s Automotive Aftermarket Division, supporting global fillers, adhesives, coatings, and sealers. Prior to moving into a full-time role with 3M, Ryan served as a collision repair technician for 20 years and during that time, as an independent consultant for 3M’s Automotive Aftermarket Division for 15 years. During his time as a technician, Ryan specialized in heavy collision and structural repairs, as well as glue pulling and paintless dent repair. Ryan is an I-CAR-certified technician with vast experience and understanding of OEM repair requirements and procedures. As a 3M application engineer, Ryan has the understanding and knowledge to replicate and develop OEM coatings and seam sealers to meet the standards and needs of the collision industry.