Determining the missing elements in misfires
This article was originally published Oct. 1, 2009. Some of the information may no longer be relevant, so please use it at your discretion.
Misfires are a common drivability issue. If the misfire rate exceeds the programmed threshold, the Engine Control Module (ECM) will record the problem and turn on the Malfunction Indicator Lamp (MIL). If the rate is severe enough to threaten the health of the catalytic converter, the MIL will flash in an attempt to warn the driver that something is seriously wrong. Some misfires, though, are intermittent enough to be noticeable but not trip a code, and these can be the toughest of all to repair.
Which cylinder(s)?
Even if the MIL is not illuminated, it's a good idea to check for stored or pending codes to see if any cylinder specific misfire codes are recorded. If the MIL is on, check the freeze frame records for the conditions the engine was under when the code was set. This can help you narrow down the possible causes and duplicate the misfire while testing.
If no codes are recorded, there are a few other techniques that can help you isolate which cylinder(s) are not contributing their fair share. Many OEM enhanced data modes have misfire history and current misfire counters in the data list. Pre-Controller Area Network (CAN) Fords have the misfire monitor results listed in Mode $06, and all CAN-equipped vehicles have these results recorded.
In addition to the scan tool, there are software programs available that, when coupled with your lab scope, use either the oxygen sensor signal or a pressure transducer signal to help isolate the offending cylinders. If you have a clear shot at the exhaust ports, an infrared temperature gun can be used to measure the temperature at the manifold. Misfiring cylinders tend to run a little cooler than healthy ones.
Once you have the weak cylinders identified, it's time to figure out what element(s) of the combustion process is missing.
Step 1: Engine health
The mechanical health of the engine is vital to the combustion process. It must be able to breathe in a full air/fuel charge, seal the combustion chamber, compress that charge, and then exhale all the remains.
The ability of the engine to seal and compress the air/fuel charge can be easily tested using a variety of methods. The first I perform is a relative compression test using a Digital Storage Oscilloscope (DSO) and a high amp clamp, so I can measure starter draw at a time base where I can see the impact each cylinder has on current draw. Weak cylinders take less effort to turn than healthy ones, and that's apparent on the scope pattern.
If you don't have a scope, a manifold vacuum gauge can be used. Vacuum should be between 18"/Hg and 21"/Hg at idle, and the needle should stay steady. A low reading also can indicate a restriction to flow through the engine.
If these preliminary tests show the possibility of a problem, additional testing is warranted. Traditional compression tests using a compression gauge should be performed, followed by a cylinder leakdown test to isolate the lack of seal to a piston/ring issue or valvetrain fault. If your first quick tests indicate the engine is okay, you can move on to the ignition and fuel systems. However, I'm finding intermittent sealing issues that can't be uncovered using these traditional methods.
Step 2: The ignition System
If the engine is capable of sealing and compressing the mix, the next area to look at is the ignition system, which is responsible for providing sufficient spark across the plug gap to ignite the air/fuel charge. Its maintenance is commonly overlooked.
Worn spark plugs and ignition wires add to the demand on the ignition coil, reducing the amount of energy left to actually fire the plug. Continual stress on the coil can lead to the coil arcing internally, causing permanent damage.
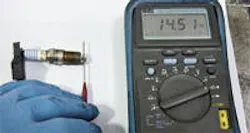
Visually inspect the plugs for wear and measure the gap using a round wire feeler gauge. Test the output of the ignition system using a spark tester or lab scope. Be sure to stress the system to its maximum to verify the ignition's ability to fire the plug under load. Don't forget to disable the fuel system to avoid pumping raw gas into the cylinders during your tests.
If you're a student of lab scope patterns, study up on reading the secondary ignition waveform. This pattern can point you in the right direction and help you determine if it is a mechanical problem, an ignition problem, or a fuel problem.
Step 3: The fuel system
The fuel system encompasses everything from the fuel pump to the injectors. Fuel must be delivered at the correct pressure and in sufficient volume to meet varying load demands. Each injector must then pass that fuel cleanly in order to provide the correct atomization of the air/fuel charge. Weaknesses anywhere along the line can result in a misfire.
Start by testing fuel pressure and making sure it meets specifications. While the gauge is connected, take a sample of the fuel using a clean container and inspect for debris the filter may have allowed past. Keep in mind there is more than one filter in a typical fuel system
- At the base of the fuel pump module
- One at the base of the fuel pump
- One in line with the supply to the fuel rail
- One in the injector itself.
Next, measure volume and compare it to specification if one is listed. If not, a quick check of fuel volume is to open the pressure relief valve on your fuel pressure tester (Make sure it's in a catch tank) and see if the engine stalls or stumbles from a lack of fuel. It takes little volume to supply an engine at idle, and any weakness here surely will be a weakness when the engine demand is higher.
Once you've verified that fuel delivery to the injectors is okay, test the injectors themselves by performing an injector balance test. This test involves manually activating each injector while measuring the drop in fuel pressure that results. Connect your fuel pressure gauge and cycle the pump to max out the reading.
Manually fire one injector, either using a special tool for the purpose, or by using the bidirectional control of your scan tool, and record the pressure drop.
Repeat the test for all the injectors, making sure the starting pressure remains constant. Leaking injectors will result in a greater drop when compared to the others, and restricted injectors will result in a lesser drop.
Final thoughts
One key in isolating the true cause of any misfire is to avoid tunnel vision — the belief the fault has to lie in one particular area alone. Intermittent misfires can be the compound result of minor weaknesses in more than one area. Don't take anything for granted, or eliminate any reasonable possibility from your thinking, until your testing is completed, and you've either verified the fault or verified the repair.
This is by no means an exhaustive list of the tests and techniques you can perform on these systems. Expand your knowledge by keeping your training current and becoming a student of diagnostic techniques.
Think outside of the box, noting your test results, and how the cylinders affected relate to one another. Look for common denominators that will help you narrow down the cause of the problem and as always, verify your repair when you're done.
About the Author
Pete Meier
Creative Director, Technical | Vehicle Repair Group
Pete Meier is the former creative director, technical, for the Vehicle Repair Group with Endeavor Business Media. He is an ASE certified Master Technician with over 35 years of practical experience as a technician and educator, covering a wide variety of makes and models. He began writing for Motor Age as a contributor in 2006 and joined the magazine full-time as technical editor in 2010. Pete grew the Motor Age YouTube channel to more than 100,000 subscribers by delivering essential training videos for technicians at all levels.
Connect with Pete on LinkedIn.