
Ignore, for a moment, EVs, aluminum-intensive vehicles, and advanced materials such as carbon fiber. Forget even ADAS. Without even those considerations, the modern vehicle has so many parts and various high-strength-steel alloys, the modern estimate or repair plan is no longer simple. It’s easy for your estimators/repair planners to forget some materials or labor operations for which you’re entitled to collect. Are you?
“If your estimators are writing sheets and aren’t borderline mentally fatigued by the time they're done with [writing] a welded panel replacement, they're leaving a lot on the table,” says Will Latuff, president of Latuff Brothers Auto Body in St. Paul, Minnesota. “I think it takes a great amount of consideration to capture all these things.”
That said, Latuff notes there are simple, obvious operations, such as prewashing or post-washing the vehicle, and topping off fluids, such as for when replacing radiators and oil coolers, that are “low-hanging fruit.”
Is there a warning sign your shop may be missing many line items?
“I think a good simple test to know where you are, aside from the length of your estimates showing the detail and the documentation, would be to look and analyze how many structural replacements you're performing in your business,” he says. “If you're putting lots of frame rails in, putting in lots of second and third layers of pillars, chances are you need to home in on your estimating. Once you start getting into those second and third layers deep in the sides of cars or full frame rail replacements in the front or rear, you're fixing something that when written properly is probably a total loss. There are exceptions on very expensive vehicles, but for your average vehicles on the road, if you write them properly for everything it's going to take to restore it, it’s more than likely going to total.”
Read on to see what items may be missing from your estimates or repair plans for which you can collect.
Battery Disconnect/Reconnect
So many repairs require the battery to be disconnected and reconnected anymore. And yet, only 34 percent who responded to a recent “Who Pays for What” survey from Collision Advice and Crash Network reported that they always research the OEM procedures required after reconnecting a battery, and another 22 percent admitted to doing it only most of the time. As Collision Advice President Mike Anderson notes, the reconnect procedures vary, but sometimes include initializing sensors or clearing diagnostic trouble codes (DTCs). And of those shops that put these labor operations on the estimate/repair plan, more than half reported they are regularly paid for them by the eight largest national insurers.
As Anderson noted in a press release detailing the survey results, he looked at procedures for one Asian OEM and found 11 procedures required after reconnecting the battery, and disconnecting the battery will often set DTCs that won’t show without a post-repair scan.
“The disconnect and the initializations after are very critical research components,” Latuff says.
It’s easily the procedure he sees missed the most, says Kyle Motzkus, manager of Hunter Auto Body in St. Louis. His shop focuses on using OEM parts and following OEM repair procedures. He’s quick to chime in with helpful advice on the Facebook group Collision Repair Technicians United. And lately, he’s conducted a class on repair-planning for the Tennessee Collision Repairers Association, with another planned for a Missouri Auto Body Association and Kansas Auto Body Association meeting Feb. 17.
“What most body shops don't realize is how the P-pages are actually supposed to work, “he says. “The pages were written in conjunction with what the manufacturer states needs to be done for repairs, period.”
He notes that seemingly simple parts removals, such as removing a taillamp, often include OEM procedures that require disconnecting and reconnecting the battery.
“When you disconnect and reconnect that battery, there’s a whole slew of other things that you have to look through. There are hyperlinks to that. Do we need to reset the windows? Do we need to document the customer's custom program presets? Do we need to do this/do that? None of that stuff is included.”

Beyond the Scan
Regardless of what the shop charges for a pre- or post-repair scan, attaching battery support via a charger/tender to make sure the vehicle has a constant, proper “clean” voltage supply is not included as part of that operation, Motzkus notes.
"That's a hugely missed item and is very easily explained."
Neither is documenting and researching any of the diagnostic trouble codes (DTCs) to see if they would have come from the collision damage or are unrelated prior trouble codes.
“The problem a lot of shops have as they look at scanning as, ‘I'm just going to plug this in and see if I have any codes.’ And then they don't know what to do with those codes. They don't understand if they see a low-voltage code, that could have been from them not having battery support attached. Or, if it's a high-voltage code, what damages can be caused by grounds and all the irreversible damage that can be caused to the scan tool.”
Motzkus inquired with the Database Enhancement Gateway, the free online resource developed to address inquiries to information providers (IPs) about collision repair estimating data, to confirm how limited is the operation of scanning.
“The consensus with all the IPs on what scanning includes is walking over to the area in which my tool is located, grabbing the scan tool, attaching the cable to the scan tool, plugging it into the vehicle, turning the vehicle into the ‘on’ mode, or ‘usage’ mode (for Volvos), turning on the scan tool, and initiating the scan.”
Research for Repair Procedures
For writing repair plans, Motzkus says companies like AllData, Sun Collision, and RepairLogic make things a little easier to break down. "I like those programs. My guys out in the shop use those programs," he says. "But I rarely use them; I go straight to the source, the OEM.”
“Obviously, the non-reusable [one-time-use] parts are a big part of the blueprint,” Latuff says. “Make sure you're hitting all those and going to the parts catalogs and looking them up."
As he notes, there is not yet a one-stop-shop that allows one to click on a part on the diagram for which it shows the procedure and provides the part number of all one-time-use parts. He offers an example of a curtain airbag replacement procedure that notes three bolts, six clips, and two spacers are required, but they’re not shown in the estimating system.
“And so then you're going to go to a separate program, maybe CollisionLink Shop or Partslink24, and you're going to look up these parts yourself. Or if that's not available, you’ll use an online diagram or call your vendor and have them transmit their diagram so that you can pick out these critical safety parts.”
The two agree that the time to research these procedures is not included and must be accounted for.
R&Is
Removals and Installations (R&Is) are one of the most missed operations and biggest problems, Motzkus says.
“The main thing you need to be worried about is what is your technician doing? And what are you not capturing for that technician, especially if they're flat rate? If they're flat rate, you should most certainly be back there with them looking at every R&I. And then that's where you should understand where the P pages come in with the OEM.”
He notes a common scenario that can result in many missed operations.
“When we take apart a door for just blending it, we're removing many things,” he says. “We remove anything to protect from overspray, like glass, door handles, and anything like that. Let's say a shop is replacing a door, and the replacement is a used door. Most shops don't understand that everything you're doing with that door, for the most part, is not included. Removal of any of the recycled components is definitely not included. When you're replacing a component, the basic understanding is that all you are removing is the trim panel and the latch, and you're bolting the door on. That is what that 1.50 to replace that recycled door covers. Everything else is not included. So you should have probably 30-plus lines just in R&I items when you're replacing that door.”
When he recently audited files for a body shop in Seattle, Motzkus said he found $200-$300 in missing R&Is on just one panel.
Latuff agrees that a front-end estimator often has a preconceived notion of how the labor operations are done, and spending some time with the technicians will likely help his or her estimating accuracy.
“A lot of people think they get all the R&Is. But unless you're at the car with your technician watching them take it apart and clicking and verifying, you're probably leaving a lot of money on the table for things that you're doing that are absolutely no contest to get paid for.”
Labor for Adhesive Appliques
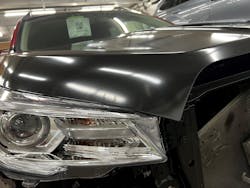
As Latuff notes, the labor to remove adhesive moldings. emblems, nameplates and decals is not included. “In CCC, the time is for installation only. So, every time you have a repaired panel or a blend panel for which you have to remove a blackout, tape a stone tape or an emblem, the time is to install it only. You need to perform an on-the-spot evaluation for the labor required to remove that part and also remove the adhesive that's left behind.”

Welder Setup
To join metals correctly so the vehicle will react in a subsequent collision the way the vehicle manufacturer has designed, there is more work to do beyond welding test coupons and checking for proper nugget tear-out. Many don't understand what welder setup is, Latuff says.
“Some people think it's just the destructive test weld, but it could be changing out the manufacturer-required wire into the welder. And for squeeze type resistance spot welding, it could be changing the arms out or changing the electrode caps. When you're putting on a quarter panel or a roof, you will have multiple arm changes on your welder to do things properly, and that all takes time.”
When the arms are switched out, it also affects other welder settings, he points out.
“For the Car-O-Liner we have, you have to go back through the electrode test and everything before you can start squeezing again. Like [Collision Advice founder and industry trainer/consultant] Mike Anderson preaches, you're not just doing one test weld on a car; you're replicating the joints and the attachment methods that you're going to be using for that panel. And so it takes a lot longer than people think.”

Trial-Fitting Parts for Dimensional Accuracy
As Motzkus previously discussed, the 1.5 hours of labor to replace the door includes the time to remove the trim panel and latch and bolt on the door. The latest CCC update does include one test-fit of a bolt-on component in the labor times, he says.
“But that doesn’t include trial-fitting the door for dimensional accuracy,” he says. “That door may have looked good in the photo, but where was the vehicle wrecked? Was the door twisted? What happened [during shipping]?”
Feather, Prime, and Block
The most commonly missed refinishing operation, Motzkus says, is feather, prime, and block.
“The problem is a lot of guys don't think of it as refinish,” he says. But regardless of whether it’s the body technician or painter who does it, it’s a refinishing operation, he points out, so materials and labor on the repair plan (and invoice) should reflect that.
“At the core of the operation, it is a painter's job to block down the work after it's been feathered, primed, and blocked,” he points out. “However, it needs to be blocked beforehand and all of the sandpaper that happens with that. It's all refinish-level sandpaper; anything 180 [grit] and above is essentially refinish-level finish sanding work, which is why CCC categorizes it as a refinish operation.”
The question of what to charge for this operation is one that comes up frequently, but it depends on the shop, and again, who’s doing it.
“Is your body guy going to be faster at feather, prime, and blocking than the painter is? I would think the body guy would be because part of his job all day long is to featheredge. prime it and block it. So I take all that into account when I do it.”
Motzkus says although each shop’s repair planner should have a baseline knowledge of the P-pages and what’s included, that person should also be focusing on what the technician is doing or not doing.
“Everything the repair planner does should be an open-ended conversation with the technician who’s actually doing the job so that everyone is on the same page,” he says. “There should be photos backing up all that work as well.”
Rather than seeing how many not-included line items he can capture on a repair plan, Motzkus says he prefers “a modest approach” by paying attention to the things that my guys are really going through the paces and doing instead of going out of their way and wasting time to do.”
As an example, he says, when applying seam sealer after a quarter panel replacement, although all conscientious technicians desire a factory-looking seam sealer width and texture, the paths two different techs take to get there may differ.
Some technicians need a layout of masking, and it's going to look like a roadmap for an hour while they do all the seam-seal work. And then there are technicians who can go in there with a Teroson on the same application, and they don't need any tape at all. Now, as a repair planner, you have to be able to take into account which technician is doing what and adjust accordingly. For the guy who uses a Teroson, doesn't need masking, and has a steady hand, you wouldn't see, 'Mask for seam sealer' on my repair plan.”
Body materials should be charged for on each job, too.
"Those materials are expensive and they're used on every job. Why should you just be giving them away? No matter who does the job, materials should certainly be accounted for."
Other Refinish-Related Operations
There are many refinish-related operations that can often be missed, Latuff says, such as backside-refinish, second or third-color setups and matte clear setups. Don’t forget to charge to mask for priming, mask openings for body work, and mask openings for refinishing. Are you charging to wrap and mask the headliner when you take it out of the car to protect it? For denibbing and polishing?
“Those sorts of things, I think, are kind of the low-hanging fruit.," he says. "And then you get down into the more technical and molecular level of estimating, where you're going through the OEM procedure and you're identifying a step in the procedure that's called out.”
Additional Resources for More Information
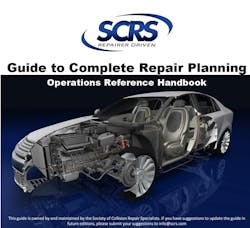
There is help available to capture additional not-included repair plan items. The Society of Collision Repair Specialists (SCRS) introduced its Guide to Complete Repair Planning in 2011 in print and free to the industry as a PDF download from its website. At more than 25 pages long, that document was designed to serve as a checklist of more than 1,000 operations that could be potentially overlooked.
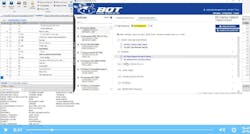
While that is still available, it has been updated and evolved into an automated software version, the Blueprint Optimization Tool, which launched about four years ago.
Using machine-learning, it's designed to partially automate the process of identifying labor operations, line items, and customizable charges that could be overlooked on an estimate/repair plan. It works by importing a completeted estimate/repair plan. The Tool's screen overlays that of the estimate. Only relevant repair lines from the estimate are imported, and clicking on "Estimate Operations" presents only the operations that were missed on the estimate. Other companies also offer estimate-scrubbing tools.
And Collision Advice (collisionadvice.com) provides an extensive library of helpful resources at no cost, including for estimating best practices, including lists and charts of not-included operations.
In determining whether something should be added as a line item to charge for on an estimate or repair plan, Anderson advises shops ask themselves a series of questions: “Is it required to return the vehicle back to pre-accident condition? Is it included in any other labor operation? Are there predetermined times? What is it worth?”
And as he noted in a previous FenderBender article, the key to writing an accurate estimate is time.
"We believe it can take anywhere from one to three hours to write a proper estimate. If your people don’t have enough time to write up a full estimate, that’s where mistakes get made."
About the Author

Jay Sicht
Editor-in-Chief, FenderBender and ABRN
Jay Sicht is editor-in-chief of FenderBender and ABRN. He has worked in the automotive aftermarket for more than 29 years, including in a number of sales and technical support roles in paint/parts distribution and service/repair. He has a bachelor's degree in journalism from the University of Central Missouri with a minor in aviation, and as a writer and editor, he has covered all segments of the automotive aftermarket for more than 20 of those years, including formerly serving as editor-in-chief of Motor Age and Aftermarket Business World. Connect with him on LinkedIn.
Don't miss Jay's next article or podcast. Sign up for FenderBender Today's Collision Repair News and ABRN eNews here.