Preventing rock chips: Best practices for surface preparation and coatings
Key Highlights
- Ensure thorough cleaning and abrasion of raw plastic surfaces, following manufacturer guidelines for adhesion promoter application within specified time windows.
- Apply sealer with flex additive and maintain recommended film thickness to act as a cushion against debris impacts, especially in chip-prone areas.
- Use proper substrate preparation techniques, such as epoxy or etch primers, when sanding through to bare metal, and adhere to flash times between coats for optimal adhesion.
- Maintain correct recoat windows after sealing to ensure full chemical bonding between layers, which is crucial for durability and chip resistance.
- Incorporate basecoat hardeners and achieve the recommended clearcoat film thickness to enhance the overall strength and impact resistance of the paint system.

Rock chipping isn’t something you can eliminate entirely, but it is something that can be minimized when all steps are taken to help achieve the most durable repair possible. Here are some essential steps to help make your repair more resistant to chipping.
Rock chip resistance begins below the surface
Undercoats are the foundation of the paint job. On raw plastic bumpers, make sure you follow the paint manufacturer’s recommended raw plastic prep procedure with thorough cleaning and abrasion. Most manufacturers require an adhesion promoter under the sealer for it to stick properly to the plastic part. One thing to make sure is that you’re following the recommended amount of time between each step. With some systems, you’ll have a set window of time between the prepping of the plastic part and the application of adhesion promoter. Don’t overlook that - if you’re past that window of time, you may have adhesion issues that will lead to chipping. In addition, there is a maximum flash time after adhesion promotor is applied that will also need to be followed. Those can be found on the manufacturer’s technical data sheets (TDS). Those data sheets should have the recommended mil thickness of the adhesion promoter as well.
Build a strong foundation with sealer
Sealer application may help reduce chipping. When sealing over raw plastic parts, adding flex additive is a best practice. Be mindful of the mil thickness of the sealer, as the sealer helps act as a cushion against small debris impacts. Manufacturer recommendations vary, but in general you should have a dried film build of at least 1 mil. Some vehicle manufacturers are now requiring an extra application of sealer or primer in rock chip-prone areas on certain models.
Best practices for chip guard applications
When spraying areas that require chip guard, such as rocker panels and fender and door bottoms, there are a few key things to remember. Firstly, make sure you’re only applying chip guard over an approved substrate. Secondly, try not to sand through the e-coat when prepping chip guard required areas on new replacement panels. If you do sand through to bare metal, make sure to treat it per the TDS of the chip guard you’re using. Generally, there are two options to prepare bare metal sand-throughs. The first would be using an epoxy primer over the bare metal, and the other would be using an etch primer followed by a primer surfacer. Also, remember to follow the flash times between coats of chip guard and the final flash before top coating over it. If you rush these steps, the texture coating won’t be fully dried through. This may compromise the strength and instead of helping to prevent chipping, it could make it a hot spot for rock chips. After it’s completely dried, it’s always a good idea to lightly hand sand before you spray a 2k sealer over the dried chip guard before base coat. That will help with chip resistance, basecoat coverage, and smooth over any dry droplets that may be sitting on top of the surface of the texture. That will help promote a more uniform appearance over the repaired area.
The importance of the recoat window
After sealer is applied, make sure you are within the recoat window when applying base coat. If you wait too long, you will not get full chemical adhesion between the base and the sealer, and durability may suffer. Refer to the TDS for the correct timing between coats. Keep in mind that the overcoat window varies from sealer to sealer. Some sealers have different windows depending on whether you’re spraying solvent or waterborne.
Strengthening chip-prone areas with hardened basecoat
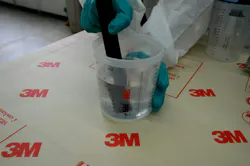
To help improve chip resistance in rock chip-prone areas, basecoats should be hardened. Basecoat hardeners vary depending on which product you use. Some basecoats have a dedicated hardener, only used for basecoats, while others use a clearcoat hardener. Again, it’s important to check the TDS to make sure you are using the correct hardener in the proper amount. Take note of the recommended pot life, flash, and overcoat times as they will change when adding hardener to the basecoat.
Achieving the right clearcoat film build
When you spray your clearcoat, make sure you apply enough to reach the recommended mil thickness. Generally, it will be in the 2-2.5 mil range when dry. Like the sealer, it will provide some level of cushion against debris hitting the front and lower panels. Note that the clear will usually call for flex additive on soft plastic parts.
Adding protection with paint protection film
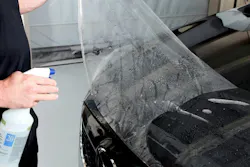
For additional rock chip protection, you can apply a paint protection film. Paint protection film is a thick plastic self-healing clear film that can help heal minor surface scratches when heat is applied. Professional installers are recommended for the application of paint protection films to ensure it is correctly applied without leaving air pockets. Every paint manufacturer has recommendations on dry times before installing paint protection film, so make sure you follow those guidelines.
Eliminating rock chips entirely may not be possible, but if you follow these steps, you may be able to keep them to a minimum and help maintain the appearance of the repair over time.

About the Author
 Michael Nelson
Refinish Trainer
Michael Nelson is a refinish trainer at the 3M Skills Development Center. Michael has served the collision industry for 29 years. He previously held production painter and product specialist roles for Finishmaster and Axalta Coating Systems. He trains painters and preppers from across the country on all aspects of the collision repair process.