The evolution of dent repairs

From the Ford Model T until the 1970s, dents were a two-sided operation. You would push from the inside with a dolly and hammer on the outside until you had a semi smooth panel.
Until 1955, lead was used as filler. The health risk of lead fillers was becoming evident, it was difficult to work with, and it was a tedious process, as lead was melted over the entire dent.
Plastic body filler was invented in 1955. Plastic body filler was becoming the material of choice, and it was more widely accepted, as more auto body shops switched from lead to the lightweight plastic filler.
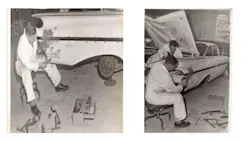
In the 1980s, the vehicles started to go through an evolution from body over frame to unitized, and so did the body repair methods.
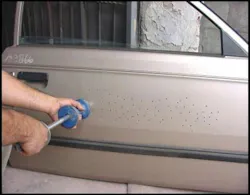
Doing hand work took a lot longer and someone came up with the idea to drill a bunch of holes (Fig 3) in the panel and use a slide hammer to pull out the dent, followed by a thick coat of body filler. I remember when you looked at the back side of the panel and the body filler flowed through the back.
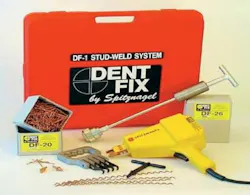
Max Spitznagel from Dent Fix introduced the stud gun and slide hammer to body shops in 1979 (Fig 4).
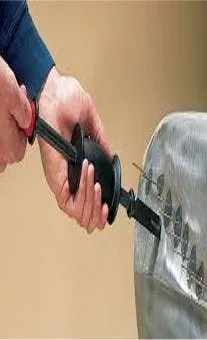
With holes no longer being drilled into the panel, it made a difference in the quality of the repair (Fig 5).
This method of repair took dent removal to a new level and was the standard for the next two decades.
In 1999, another dent pulling device hit the market – The Maxi by Dent Fix (Fig 6), which is still widely used today.
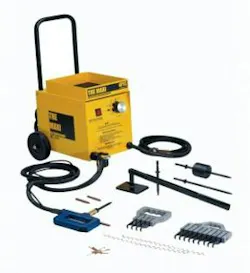
The Maxi Multiple Pull Dent Station is a 120V or 220V single phase dent-pulling station that provides the technician with the power to shrink, pull rocker panels, and fix hail damage, creases and dents in hard-to-access areas. The major drawback for these machines is the heat affect zone and a corrosion hot spot on the back of the panel (Fig 7).
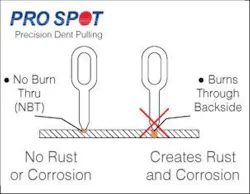
To solve those problems, the Miracle pulling system was introduced around 2010 (Fig 8).
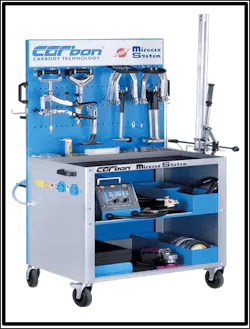
This system uses low voltage/reusable pulling keys (Fig 9).
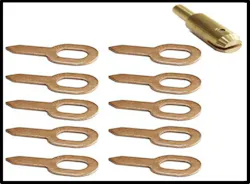
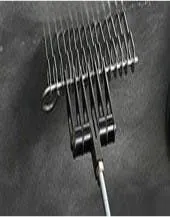
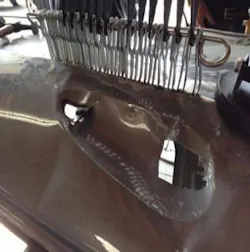
The keys were placed next to each other and a rod was inserted through the oblong opening (Fig 10). A bridge pull was secured to the panel and an arm or hook system was attached to the bar. The pulling part of the bridge was set into motion. The deepest part of the dent was first to come up and as it was being raised, more of the eyes became engaged, thus pulling the entire dent out in one operation.
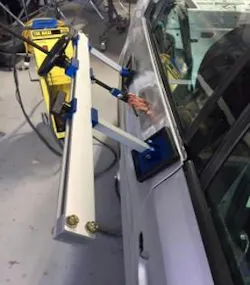
In my first try with the Pro Spot dent-pulling system, I attached the keys to a body line (Fig 11), which should be the first item of repair. I attached the lifting bridge to the door and pulled the body line until it was straight, using a steel ruler to check my pull. I removed the keys and pulled the keys attached to the dent and pulled it out (This door was junk because the intrusion beam was destroyed in the collision). I got the dent out and used the hand puller to finish up the repairs to the door.
Another manufacturer that hit the market was the Flatliner, followed first by Pro Spot International’s Pro Pull Complete using the PR-3 A.

The PR-3A has two guns. The pistol-type gun is a single-sided attaching gun. You can use it to attach body pulling pins, washers, bolts, and nuts to panels.
The long narrow attachment is the keys attaching unit. You attach the key and hold it on the metal and the timer in the unit will come on and in less than a second, the key will be attached. After the pull has been completed, the key will twist off.
I reuse the keys by grinding a new point, usually necessary after three or four times. I have reused keys on large rings for the various lengths of the reground keys.
Three years ago, Dent Fix introduced three items to the Maxi System, a bridge puller, hand pull and magnetic key holder, along with two styles of keys (Fig 12-15).
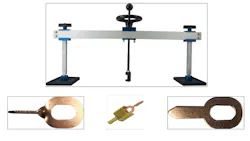
To use this attachment, first remove the pulling electrode from the gun and then attach the magnetic key hold. Put the key on the dent and pull the trigger. Done.
I really like the magnetic header to hold the key in place.
Moving on, the next big thing in dent repair is GDR, or glue dent repair.
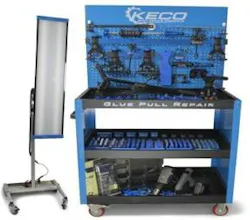
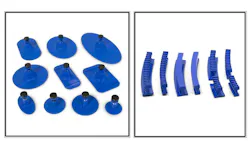
First off, GPR (glue pull repair) is not the same as PDR (paintless dent repair). See Fig 17. I am going to use Keco Tabs for my examples of GPR because they have the widest range of tools and tabs designed for GPR. Figs 19 & 20 are a small sampling of all the different styles and sizes glue pulling tabs offered by Keco Tabs.
Why GPR?
GPR has several advantages over the traditional methods of dent repair:
- Much of the original finish remains on the
- The dent is pulled out at one time instead of multiple pulls and
- The same tabs can be used on steel and aluminum (Keco has tabs designed for aluminum).
- It uses less body fillers, sand paper and primers when compared to stud welding, sometimes none.
- No corrosion hot spots on the rear of the panel.
- Easy to learn.
- Small dents to a blend panel can be removed with original finish left intact. A lot of the time the dent is repaired by the repair facility at no charge to the customer.
- It’s a very low-cost investment compared with specialized aluminum and steel pulling systems.
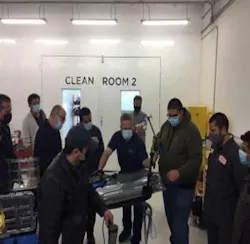
One thing Keco Tabs has over its competitors is it offers in-house training for a shop or multiple shops. The hands-on training is a six- to seven-hour class with a limit of eight techs (Fig 21) for a class at Scandinavian Coachcraft.
A few years ago, Chris White, CEO of Keco Tabs, and Gene Fetty, lead trainer at the time, conducted three training classes in Los Angeles. Twenty-three techs from 11 collision centers attended one of the three six-hour classes. Keco sent out three units for hands-on training that were immediately sold at the conclusion.
Ten of the 11 shops bought the system and three of those bought a second system after use in their shops.
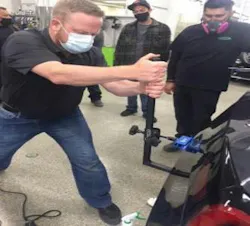
Fetty asked anyone at the three classes if they had used glue tabs. A couple of techs in two of the three sessions said they had. He then asked if they had any problems and both said the glue did not stick very well. He asked the tech at each class to put a tab on a panel and use the Keco Tab leverage puller to lift the dent. Both times, the tab gave way with very little pressure.
Fetty introduced the 6 C Keco tab process and proceeded to put the same tab on a Tesla quarter panel (Fig 22).
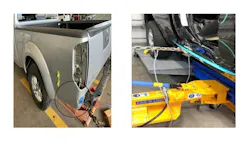
The result was the tab held with all that pulling force.
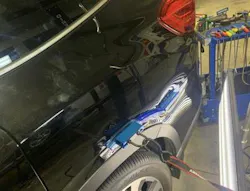
Fetty spent time with each tech on how to read a PDR light, which comes with the level 2 kit, and the use of it in the dent removal process (Fig 25).
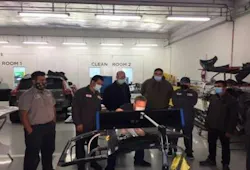
A side note: I used the PDR light to highlight the damage on the vehicle when taking a picture.
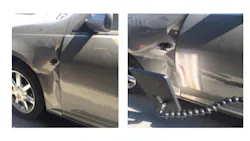
In Fig 26, I had the estimator take a picture of the damage for the insurance company claim. It is very hard to see the damage to the left door. I put the PDR lamp on the part in Fig 27. You will notice one of the light tubes is bent, indicating damage to the door. I had him take a marker and mark damage before sending the pictures. I have a few shops using the lights and the results have been terrific. It has reduced the friction time, as well as phone calls with insurance companies.
In conclusion, there is no one perfect system out there for every kind of dent repair, but having multiple systems, including the glue-on tabs, will give your technicians the best possible dent repair outcomes.