Refinishing tri-coat and quad-coat paint


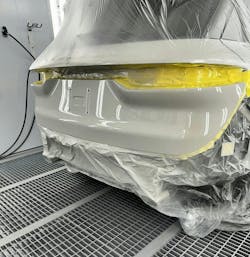
The world of auto refinishing has seen a rise in complex paint finishes in recent years, pushing the boundaries of aesthetics and demanding meticulous application techniques. Typical application methods taught in the past won’t cut it on many of today’s colors. We’ve all dealt with tri-coats in the booth for years now, but within the last five to 10 years we’ve seen the introduction of quad-coat paint jobs. Quad-stage jobs, with their captivating depth and shimmer, are a prime example of this evolution. But for body shops, refinishing these intricate layers requires a deep understanding of the process and precise execution.
Let’s dive into the world of tri-coat and quad-coat refinishing, exploring the materials, techniques, and considerations involved in achieving a flawless finish.
Understanding the Layered Look: Tri-coats vs. Quad-coats
We all understand the basics of a typical base/clear paint job and all the tricks that go with matching and blending within our shop’s respective paint lines. Tri-coats and quad-coats elevate this process by adding additional layers for visual intrigue.
Tri-coat: This paint system incorporates three distinct layers:
Base coat: This establishes the car's foundation color.
Mid-coat: This layer contains transparent pigments that create an iridescent effect, causing the color to shift and shimmer depending on the light.
Clear coat: The final layer protects the underlying coats and provides a glossy finish.
Quad-coat: Taking complexity a step further, quad-coats introduce a fourth layer:
Tinted clear coat: This layer adds a subtle hint of color or translucency on top of the pearl coat, further enhancing the depth and visual play of the finish.
Base clear, midcoat, clear- In some colors (for example, Mazda’s Machine Gray, 46G code), some paint manufacturers recommend applying the ground coat, followed by clear, prepping the fresh clear with a finer grit process, then application of the mid coat, and clearing again.

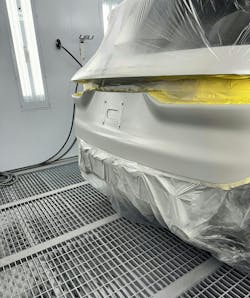
The Refinishing Process
Refinishing a tri-coat or quad-coat paint job requires a skilled technician with a keen eye for detail. While a blendable match will get you moving through the booth, it’s just as important to understand that some of today’s specialty coatings require a different prep method. For preparation, I liken it to solvent vs water. They both have certain aspects that make the system work best. You wouldn’t prep a metallic blend area with 500 grit for water, would you?
This is one reason I am a huge advocate of going to classes by your paint manufacturer, especially those dealing in specialty coatings. I received my Master Certification at Axalta’s facility in Concord, North Carolina, in a class led by Bob Little. In those classes I took to get there, I wound up learning quite a bit about real-world application and not only the “what” to do but more importantly the “why” to do things a certain way. No one will be able to answer questions pertaining to your paint system better than the manufacturer.
NOTE: Owners/managers should invest in the paint shop and send painters to classes. The paint shop staff should be staying up on furthering their skills just as much as is the body side of the shop. We don’t repair vehicles like we did in the ‘90s, and we are not using the same coatings as then, either.
Let’s again reference Mazda’s Machine Gray, 46G. If you were painting in the collision repair field, you remember the headache that this color caused many of us when it hit the market (myself included). Several manufacturers started putting out documentation of the color and suggested tips. PPG came out with videos on their recommended blending techniques and walking through application of the color, and Axalta soon followed, as did the other manufacturers. With Axalta, for example, they wanted 46G sprayed as a quad-stage. At the time, they wanted the black base coat shot, followed by clear. Then the entire surface was to be prepped with 1000-1200 grit sandpaper and a gold Scotch-Brite pad.
This was the first time I had ever come across this new procedure. It is what drove me to start asking questions and diving deep into learning about the newer coatings. It turns out that it used a new metallic that was ground so much finer than what they had been using, they were seeing the sand scratches of normal blending techniques through the mid-coat layer when traditional prep techniques were employed. That’s something I would never have found out if I didn’t have a buddy that had just gone through a specialty coating class.
Matching the OE appearance and color match
As with any multistage coating, understanding the matching process is half the battle. This is where having tools at your disposal really come into play. You can ask 10 different painters how they match these tri- and quad-stage colors, and you are going to get 10 different answers. But their most common solutions are to refer to previous sprayouts kept in a library, using color chips, and even a “camera” (spectrophotometer) . When it comes to tri-coats, the ground coat matters. Most midcoat layers do not carry enough pigment to offset a ground coat that’s the wrong shade. And I believe I speak for ALL of us painters when we’ve put a bumper up to a car and seen how snow white it was compared to the body.
One trick that I have seen work many times for the ground coat is to use a camera, if available, to your shop. Most of today’s color-mixing programs have individual settings for their respective spectrophotometers and can get you in the ballpark with two simple steps:
Lightly sand the surface to be read with 1500 and take your readings. This allows the camera to focus more on what the ground color should be.
When uploading the readings into the computer, select the option to read the color as a solid. This forces the camera to focus just on the flat color shown by the previous sanding and to ignore the pearl.
Obviously, a sprayout is necessary for any verification of color, especially a camera reading. One thing to understand here is that many painters tend to rush this process of a sprayout. The card needs to be sprayed as it is a normal panel for a car and flashed the same way. Too many times, I’ve seen painters just piling on color coats, not giving the proper flash, and then following up with wax and grease remover. While the use of wax and grease remover can give a decent simulation, nothing replaces the appearance of a clearcoat. ot to mention, it also allows you the chance to catalog the sprayout among a library of other cards for future reference. LABEL YOUR CARDS. Do not get lazy here; be sure to document what variant, reference number, number of coats, psi, whether you put a control coat or not, and even affix a printout of the formula used to the back of the card.
NOTE: From one painter to another, building a library gives you a quick firsthand look at colors and eliminates the guesswork from your day-to-day duties. While it may seem like a lot of work up front, I promise you that a library will soon begin paying you back on tinted and camera shot formulas. At one point in my career, I had hundreds of cards in one paint line when I was still spraying solvent. Keep them clean, keep them organized, and keep things moving forward.
One last point to make is that it’s imperative to follow the recommended application and flash times. Some paint systems require use of an activator in the ground coat(especially in water systems) prior to applying the mid coat. When dealing in multi-layered refinishing, one of the most important steps is to ensure that the layers are dry prior to applying the next coat. While, yes, this sounds elementary to some, you would be surprised how many times I’ve seen tri-coats having to be redone due to improper flashing, which has resulted in overapplication of the product.
Take the time to learn how your paint manufacturer recommends certain colors are applied. It is also important to note that blending methods are different for some lines from solvent to water. If you’re making the switch from one to the other, it is important to work with your tech rep and get into classes to learn all the intricacies of each line.

About the Author

Jeremy Winters
Accudraft Paint Booths Content Creator Jeremy Winters spent 18 years daily in the paint booth doing collision and restoration work. He was the host of the popular BoothTalk podcast and currently works for Accudraft Paint Booths. He has appeared alongside TV personalities Kevin Tetz and Ian Johnson on their respective shows helping out with bodywork and painting. He got his Bachelor's degree in Business Administration with a concentration in marketing from Middle Georgia State University in Macon, Georgia. His goal is to help techs be the best versions of themselves they can be and to further education within the industry.