Implementing your first OEM diagnostic tool: A practical guide
Key Highlights
- Start by analyzing your shop's most common vehicle makes and tasks to choose the OEM software that offers the best return on investment.
- Use dedicated, standardized laptops with specific hardware specs to prevent conflicts and ensure consistent performance across all diagnostic activities.
- Implement a structured installation process, including prerequisites and testing, to facilitate quick recovery and minimize downtime.
- Train multiple team members on core diagnostic procedures, account management, and security protocols to ensure operational resilience.
- Schedule regular maintenance, updates, and lifecycle reviews to keep the diagnostic system reliable, secure, and cost-effective.
The questions come up a lot: “How do I get started with factory diagnostic software? And where do I get it?”
Implementing an OEM diagnostic program is not hard, but the first time can be confusing.
Before you start, decide on:
- Target vehicle makes you will support
- Hardware you’ll use
- Network/Internet setup and reliability
- How often do you do immobilizer/security-restricted work
- Support and software maintenance plan
- Training your team will need
This article shows where to begin, how to choose your first OEM, and how to set up a clean and repeatable install.
Build to your 80% mix
Start with data, not guesses. Your first factory tool should match the bulk of your work. When one OEM covers most vehicles with the most valuable jobs, you get faster payback.
Pull the last 12 months of repair orders. Group by vehicle make and include revenue. Sort the vehicle makes by RO count or revenue and calculate a running total. Stop when you hit about 80%. That short list is where your first OEM should come from.
Now, map the work by vehicle make. Note how often you do pre/post scanning, programming or coding, immobilizer or other security-restricted operations, and ADAS calibrations. You’ll see which tasks you should plan to bring in-house now, and which can wait.
Baseline your current spend. Total what you pay for remote diagnostics and sublet work — programming, immobilizer/security, calibrations — by task and by make. If you can, add a rough cost for delays and rework tied to outsourcing. This is your savings pool.
Build a basic budget per make. Include licenses and subscriptions, the vehicle communication interface (VCI, J2534 or OEM) and cables, the laptop you will dedicate to this OEM, training or portal fees, and IT time for imaging and updates. Decide up front if you will keep immobilizer/security work sublet for now, or if you will secure the required credential — National Automotive Service Task Force (NASTF) Vehicle Security Professional (VSP) — and bring it in-house. The goal is simple: cover your most frequent tasks for the chosen makes without edge-case workarounds.
Roll out in stages. Start with the top vehicle make that covers the largest share of your 80 percent mix. After the successful implementation of your first OEM software, you will be able to rapidly deploy a second, third, and so-on.

Hardware and network baseline
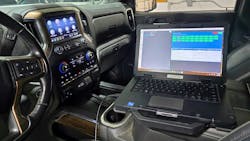
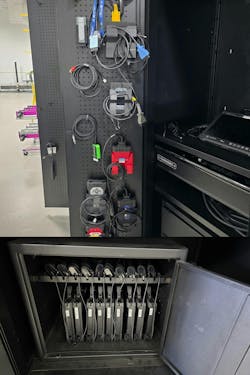
Use dedicated laptops for your factory diagnostic software program. If possible, maintain at least one spare laptop and standardize the image so you can rebuild fast should a laptop go down for any reason. Multiple OEM programs on one operating system (OS) can conflict. If conflicts arise, use separate laptops or set up separate Windows installs on different disk partitions. While having individual laptops per OEM increases costs, it gives flexibility to prevent techs being idle waiting for another tech to finish with a laptop that is loaded with multiple brands.
Set your spec to cover high requirements across brands: as of this writing a 12th-gen (or newer) Intel Core i7/i9 or AMD Ryzen 7/9, 32 GB RAM, and a 1 TB NVMe SSD should cover the maximum requirements from most OEMS. However, you should always check and confirm current OEM requirements before purchasing any equipment. You also want at least two USB-A ports (this can be a critical requirement for powering a VCI dock), one USB-C, ethernet or a reliable USB-ethernet adapter, Wi-Fi 6/6E, and a 1080p display or better.
In most cases, when selecting a VCI, a J2534 pass-thru will handle scanning and flashes without issue and get you up and running. But be aware that the OEM VCI may be required if purchasing non-R2R versions of OEM programs, confirm requirements prior to purchasing OEM software.
Put diagnostic laptops on their own service set identifier (SSID), avoid guest Wi-Fi. Add firewall allow-lists for OEM domains and ports.
Accounts, emails, and access
OEM portals use logins, multifactor authentication (MFA), and sometimes license seats. If one person “owns” everything on a personal email or phone, the program stalls when that person is off or leaves. Design the account user structure up front to prevent time consuming overhauls down the road.
Create one shared mailbox or distribution list per OEM—for example, [email protected] or [email protected]—that can sign in and receive email. Set up MFA you can share safely. Register two or three devices: the diagnostic lead’s phone, the backup tech’s phone, and a front-desk device stored securely.
Assign an account owner for each portal and a named backup. The owner manages seats, renewals, and contact with OEM support. Store portal URLs, the DL address, passwords, backup codes, security questions, and any certificates or keys in a team vault. Limit vault access to the diagnostic team and the IT owner.
For immobilizer or other security-restricted operations, follow the credentialing process for NASTF VSP. If you won’t bring this work in-house yet, document which tasks stay sublet and to whom.
For offboarding, rotate the DL password the same day a staff member leaves, de-register their MFA device, and update the owner/backup list. Quarterly, verify that the backup can sign in without help.
Where to find OEM software
Here are a couple of ways to find OEM software:
NASTF
Create a free NASTF account and use the Automaker Info link to reach each brand’s official portal. This page groups what you need—subscriptions, diagnostic downloads, and support—and are kept current.
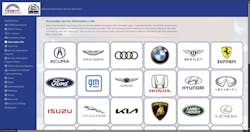
Go direct to the OEM portals.
It should be noted that you’ll have to search in a format like “[Brand] service information” or “[Brand] technical information” or “[Brand] diagnostic software,” then verify the domain is the OEM’s official site.
On each site, locate these areas:
- Service Information (manuals, TSBs, wiring, data)
- Diagnostic Software (client downloads, prerequisites, VCI utilities)
- Subscriptions/Licensing (daily/monthly/annual; programming and security add-ons)
Subscription Tips
- Use DL emails for all purchases.
- Expect some brands to split service info and diagnostic software subscriptions.
- Keep an internal document to track: OEM portal URL, account email, and renewal date.
If you do security-restricted work, confirm the brand’s immobilizer/key-code process and ensure your NASTF VSP credentials are available at the time of purchase, as some OEMs have immobilizer/security specific subscriptions. Some key-code portals are also separate from the main service-info site and will prompt for VSP credentials when purchasing.
Installation
You want a clean, repeatable install that any tech can follow and recover from. Prepare the laptop. Install in a strict order. Capture versions. Verify on a vehicle. Keep a one-pager in your vault and update it when versions change.
Keep the OS clean and controlled. Remove bloatware (unwanted pre-installed software) and vendor updaters. Create a local admin account for installs only; use a standard user for daily work. Prevent sleep and hibernation either while on battery or plugged in. Install only required runtimes like .NET or Visual C++ redistributables (depending on the OEM program being used you may have to find older versions for the program to work). Document settings, changes, and any other items that were required to make the OEM diagnostic program operational.
Install in this order:
- VCI drivers. Verify in Device Manager and update VCI firmware if required.
- The prerequisites: .NET, Visual C++ redistributables (i.e. libraries of prewritten code), and Java if the OEM requires it.
- The OEM client. Use default installation paths unless your company policy says otherwise. Reboot if prompted. Then set network and proxy rules and confirm DNS resolution for the OEM URLs. Launch the app and sign in with the DL. Complete MFA if required. Confirm a license seat is assigned. Let the app pull its first module updates and note the versions.
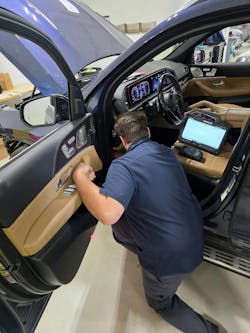
Do a quick app test on a vehicle. Confirm the app sees the VCI, read the VIN, and can pull DTCs. Run a simple bidirectional test, such as an indicator sweep. If the tool shows a module list, verify it populates and IDs control units. Additionally, confirm that the app can save and print the necessary reports.
Training SOP
Make sure the process is teachable and resilient. If possible, have three shop roles maintain the program:
- The diagnostic lead owns the day-to-day operation.
- A backup tech covers when the lead is out.
- The IT owner maintains images, updates, and access.
Each tech should show core skills, such as:
- Being able to sign in with the DL and MFA.
- Install VCI drivers, verify in Device Manager, and update VCI firmware.
- Handle network basics: switch between wired and Wi-Fi.
- On a vehicle, read the VIN, list modules, pull DTCs, and run a simple bidirectional test.
- Save screenshots or a short session log to the standard folder.
- Know how to transfer a license seat.
- Know the policy for security-restricted work — even if you still sublet it — and how to escalate.
Use high-quality e-learning, online communities, or in-person training for fundamentals or to expand a tech’s knowledge on OEM diagnostic software usage, e.g. Diagnostic Network, various tooling and equipment vendors, or local trade associations. Record a live demo from the diagnostic lead that other techs in the shop can refer to. Schedule hands-on repetitions on a non-customer vehicle during slow time. Make sure to build proficiency with the tools to build tech confidence.
Maintenance and Support
A light, predictable maintenance cadence keeps the software reliable and the bays moving. Treat it like any other preventive service. Set a weekly ritual to open each OEM client on every diagnostic laptop, confirm it launches cleanly, and verify the VCI is seen. Once a month, schedule a short, off-shift maintenance window to apply Windows and OEM updates, then run a quick vehicle test to make sure communication still works. Every quarter, refresh the gold images if versions have drifted, and test the spare laptop and spare VCI. Once a year, review lifecycle items — laptop age, VCI condition, operating system support timelines — and budget replacements before failures force the issue. Keep a brief change log so you always know what changed and when.
Renewals should never be a surprise. Put every subscription, license seat, certificate or token, and your NASTF VSP credential on a shared calendar tied to the diagnostic program’s mailbox. Use simple 60-, 30-, and 7-day reminders so the whole team sees upcoming expirations. Keep a business credit card on file along with a backup payment method and note any renewal steps that require special approvals or identity checks. When staff roles change, verify that renewal notices and receipts still land in the right inbox and that ownership details are current.
Spares are cheap insurance. Maintain one spare laptop imaged within the last month and staged with the same versions as production. Keep a spare VCI ready with a labeled, known good cable, plus a small bin of perishables and adapters — Ethernet cables, Ethernet adapters, USB cables, and an extra power supply.
Conclusion
Factory diagnostic software isn’t a one-time purchase. It’s a process you build and keep steady. Start with your 80% mix. Pick one OEM that initially covers most of your work, decide what stays sublet and what you’ll bring in-house (including whether to pursue NASTF VSP), and budget for the real pieces — licenses, VCIs, a dedicated laptop or laptops, training, and IT support if needed.
Standardize how you work. Use shared accounts with multi-device MFA, store credentials in a vault, and keep installation steps that any tech can follow. Verify on a vehicle and write down what you changed. Train a lead, a backup, and an IT owner so that the program doesn’t hinge on one person.
Then keep it on the rails. Open the tools weekly, update monthly, refresh images quarterly, and plan lifecycle replacements annually. Put renewals on a shared calendar. Maintain a spare laptop, a spare VCI, and known-good cables.
Go live with one OEM, measure the wins — fewer delays, fewer comebacks, less sublet spend — and then confidently add the next. Do it this way and the “factory tool” becomes routine shop work: reliable, documented, and profitable.
About the Author
Paul Bostel
Director of Advanced Vehicle Technology
Paul Bostel is a seasoned leader with a rare blend of expertise in both advanced automotive technology and fire service operations. With over 20 years in the automotive industry, he is recognized as one of fewer than 2,300 ASE World Class-certified technicians — a distinction that underscores his mastery in diagnosing and repairing complex vehicle systems, with a specialized focus on ADAS. Paul is director of Advanced Vehicle Technology for Quality Collision Group, where he applies his analytical precision and strategic mindset to elevate operational performance and repair standards.
In parallel with his automotive career, Paul has proudly served the Apple Valley Fire Department for over nine years and holds the rank of captain, demonstrating his strong leadership, commitment to community service, and ability to manage high-pressure environments. His career is defined by innovation, efficiency, and a continuous drive to raise industry standards across every role he takes on.